Lacto-fermented potatoes offer a better flavor and texture, while being easier to digest! Fermenting your potatoes in salted garlic brine dramatically improves the flavor of the potato while helping them become more tender in the center with a crispy skin. This trick has been used by French and Belgian chefs and is a game changer for the potato lover.
Once you’ve tried soaking your potatoes in salted seasoned water, you’ll never want to go back!
It’s so easy and creates a unique flavor!
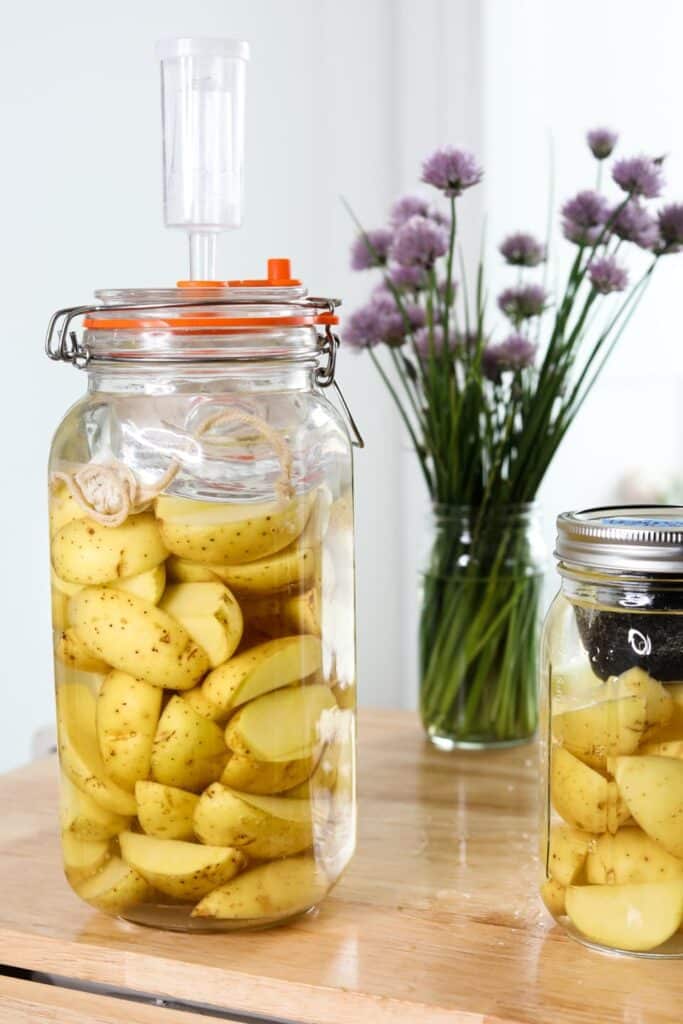
Why Lacto-Ferment Potatoes or any other vegetable?
There are many benefits to lacto fermentation!
- It improves flavors! For potatoes specifically it helps make them crispier on the outside while staying buttery soft on the inside. The potatoes pick up the salt that they ferment in making them flavorful from the inside and out. The fermentation process adds a very slight tanginess to the potatoes (deepening on how long you ferment them for). It’s not quite as tangy as salt and vinegar chips but has a subtle note of it.
- It improves digestion! The process of fermentation has the Lactobacillus bacteria eats the starches and sugar from the potatoes. Because of this eating fermented foods can be helpful to managing your blood sugar.
- Fermentation is a great way to preserve vegetables. While storing potatoes and root vegetables is less of an issue compared to other fresh vegetables, it can still be helpful! If you love the taste of tangy potatoes (especially if you pair it with vegan cheddar and green onion), you can ferment these potatoes for months. While I personally wouldn’t ferment potatoes for longer than 1 month because the flavor gets very strong at this point, you certainly could!
How to Lacto-Ferment Potatoes
Don’t be intimidated by the term lacto-fermentation! This process is as simple as soaking chopped potatoes in salted water with your favorite flavorings. You can change the result of the flavorings by changing the types of spices you want to use. The amount of time you allow the potatoes to soak will also affect the flavor. The longer you let them soak, the more intense the flavors will be!
Start by cleaning your potatoes. If you use inorganic potatoes, you will want to peel them. Potatoes are a crop that farmers will liberally apply pesticides to; according to Washington College peeling the potatoes will help reduce toxic glycoalkaloids.
If you are using organic or homegrown potatoes, you can skip that step!
From here you will want to cut your potatoes into your desired shape. French fries, cut into wedges, or cut into small cubes are great shapes to chop up these potatoes.
Keep Everything Submerged
The most important step for lacto-fermentation is ensuring that the foods you are fermenting are completely submerged in the brine. Anything that floats to the surface is a mold risk and a contamination risk. This is why many people will use glass weights to ensure that nothing floats to the surface. A few peppercorns at the surface are fine – just don’t eat them! Everything under the brine is safe to eat.
With the portion of brine to potatoes in this recipe you do not need to use a weight- the brine should cover the potatoes completely. The potatoes don’t float like many other vegetables.
If you do encounter a floating potato, you can use a glass fermentation weight to weigh it down. Another option that I learned from Pascal Baudar’s book ‘Wildcrafted Fermentation’ is to use a large rock to weigh down your fermentations. You will want to boil the rock for 30 minutes to ensure there is no contamination- but that works great as a fermentation weight! Just be cautious of what type of rock you are using so you don’t add unwanted minerals.
Another option is to fill a freezer plastic bag with water and stuff it inside the jar to help weigh everything down.
Keeping everything sterile is the most important part of fermentation. Since the fermentation sits at room temperature for multiple days you want to make sure that you prevent mold from forming.

Keeping Everything Sterile
Before you start making your brine and chopping your potatoes you need to make sure everything is sterilized.
The first step is to work in a clean space- you don’t want any contaminants to float into your creations!
The second step is to boil water and pour that into your jar- this will kill any organisms that could contaminate your fermentation. Pour some of that boiling water over your jar lid as well.
Before chopping your potatoes, really scrub them down and cut of any bits that are rotten or less fresh.
When chopping your potatoes ensure your cutting board is clean so you don’t get contamination from that.
Keeping everything clean is incredibly important to food safety when you are fermenting foods!
After a few days of fermenting, you’ll notice a little film over the top- that is fine and completely normal! However, if you see any floating potatoes with mold on it you’ll need to throw it out and start over. This is unlikely as potatoes don’t tend to float and there is a lot of brine to cover these potatoes.
How long does Fermentation take?
The short and sweet answer is the longer you ferment- the stronger the flavors are!
Even soaking potatoes in salted water for a few hours will dramatically improve the texture and flavor of your potatoes. If you add some garlic cloves and spices the flavors penetrate inside the potato and really make a spectacular result. To make your potatoes able to pick up on the spices and garlic flavors you’ll want to ferment them for at least 2 days.
Think fermentation processes as a marinating process!
After 4-5 days you’ll notice the potatoes will have a much stronger flavor and have a bendy texture. When you roast the potatoes, this will create a buttery soft center with an extra crispy exterior.
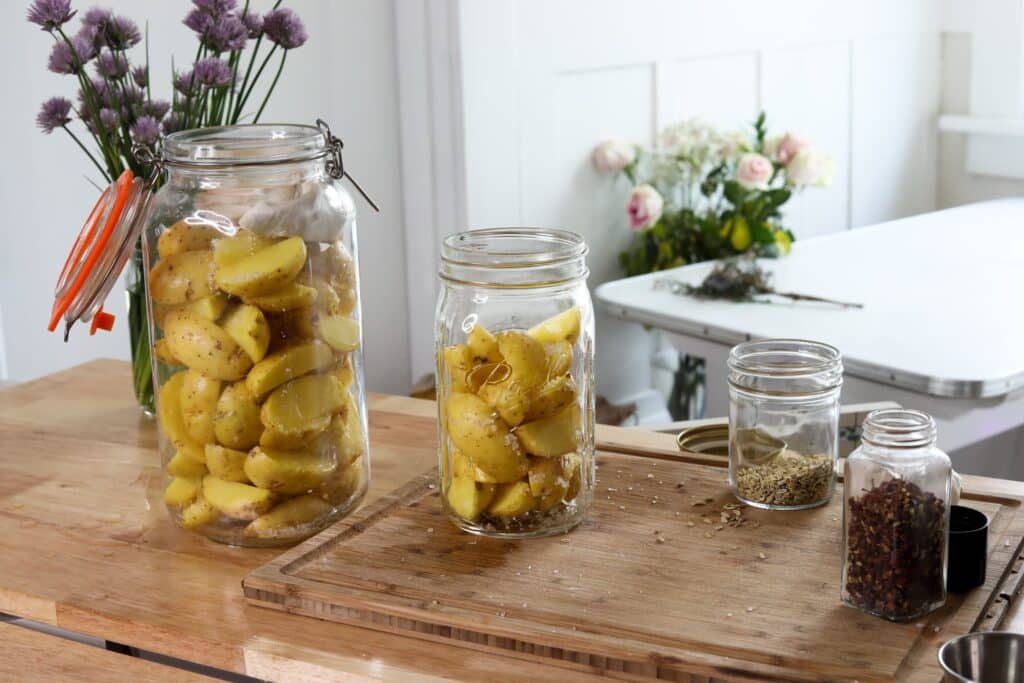
Spices for the Potatoes
There are a lot of directions you can go with flavoring these potatoes. A good place to start is with a bay leaf and crushed garlic. Something simple like this is perfect if you want to season the exterior of your potatoes before you roast them.
If you want a tex-mex theme for your potatoes consider adding some cumin seeds, sliced jalapenos, and crushed garlic.
For a more herbal blend try adding some fresh sage, oregano, bay leaf, dried lavender, and thyme.
You can use your favorite spice blend to ferment these potatoes and get a wonderful result!
To prevent mold place your spices in a tea bag, muslin bag, or inside some cheesecloth to prevent them from floating to the surface.
When you roast the potatoes after fermentation, first season the potatoes with the same spices you fermented them in to really crank up those flavors.
How to Prepare the Potatoes After They Are Fermented
Treat the fermented potatoes like the raw potatoes they are. After you ferment them, you’ll want to roast, fry, air fry, or bake them using your favorite potato recipe.
Roasted Potatoes
In this recipe for Crispy Rosmary Garlic Potatoes you are supposed to soak the potatoes in salted water for 20 minutes.
It is much, much better with fermented potatoes! Try fermenting the potatoes with crushed garlic and rosemary for 3-4 days before roasting them with more rosemary, garlic, and sage- it’s a breathtaking experience!
Gnocchi
Gnocchi is another fantastic way to use these fermented potatoes!
It adds a depth of flavor that is phenomenal with plant-based parmesan or gouda!
To make fermented potatoes into gnocchi, ferment them whole with the skins on. Since they aren’t cut up they do not pick up the flavors well and will need a longer fermentation time. Allow the potatoes to ferment for 10-15 days if doing them whole. From there you’ll either steam or roast the potatoes, peel the skin, and mash them for the gnocchi. Try pairing them with a pesto and your favorite plant based sharp cheese.
Pierogies
The fermented potatoes not only make a great filling for gnocchi but for other dumplings like pierogies! Pierogies are incredible with some sauerkraut, cheese, and caramelized onions- the flavor of the fermented potatoes makes them into perfection!
Fries
The best fries or chips are made with fermented potatoes! Ferment them for 10 days for an extra tangy fries that are just like vinegar chips (add extra malt vinegar when serving of course!). Fermenting the sliced potatoes for even as short as 24 hours will make them crispier and improve the overall flavor without making them taste tangy.
Cut the potatoes into fry shapes before you ferment them in the salted water!
Potato Cheese Sauce
A healthy cheese sauce made from potatoes and vegetables is a great way to use these fermented potatoes! Sauce Stache made a great cheese sauce with fermented potatoes. It’s very similar to my Nut Free Queso Recipe- and it is phenomenal with fermented potatoes! It adds the depth of flavor that really makes it more cheesy!
Looking for other Fermentation Recipes?
- Try these fermented brussels sprouts! They are crunchier than pickles with the same sour taste! They are perfect for Hors d’oeuvres or a light snack to go with nuts.
- This cultured cream cheese is another gut friendly hit! This sunflower cream cheese is cultured with yogurt, the whey separated for a thick and creamy spread!
- Sourdough Pizza Bread is the GOAT of sourdough– each slice tastes like pizza! Sourdough is technically fermented flour which gives each loaf a fluffy rise while being gut friendly!
- Pull Apart Garlic Sourdough Bread is another savory fermentation recipe! This recipe has you make garlic bread using your sourdough starter and it is loaded with various types of garlic
- Sourdough Discard Tortillas are another gut friendly recipe. This recipe uses your sourdough discard to ferment the rest of the tortilla dough to give it a tangy flavor while being easier to digest.

Fermented Potatoes
Ingredients
Instructions
- Clean your potatoes, and quarter them. Add everything to a clean and sterile large jarEnsure the potatoes are fully covered with water and nothing is reaching the surface. Use a glass fermentation weight if necessary.Let sit for 3-30 days depending on flavor preferenceA longer fermentation period will result in a pickling process- perfect for those who love salt and vinegar chips! Even a quick 3 day fermentation will give you a mild flavor that is superior when roasted
- Roast, bake, steam, boil, or fry your potatoes before eating.If boiling the potatoes ferment them for longer so they retain the flavors
Notes
Looking for a quick way to prepare your fermented potatoes?

Toss them in a little olive oil, add your favorite seasonings, and air fry for 25 minutes at 350F
The potatoes shown above are coated in:
1 tbs of olive oil
1/2 tbs nutritional yeast flakes
1 tsp garlic powder
1 tsp onion powder
Do not add salt as the fermented potatoes will absorb salt from the brine while they are fermenting.
The process of fermenting the potatoes helps draw out the water without drying the potatoes, helping them get extra crispy while retaining that soft center.
What can beat an extra crispy yet tender potato with a garlicy and salty flavor?!
I just put everything in the jar but should I have dissolved the salt first? Can`t wait to try them!
Dissolving the salt first is very helpful! I’ve found it dissolves on its own and typically I like to stir/ shake up my potatoes when I check on them
Doesn’t exposing the potatoes to heat destroy the beneficial bacteria after you have gone to the trouble of fermenting them?
Heat does destroy probiotics, however the benefit is the probiotics eat the simpler sugars in the potatoes (while they ferment) making them easier to digest. Another benefit is the potatoes get a nice and tangy flavor and become extra crispy if you roast them.
can I eat them without cook it ,after the fermentation process end?
You can eat them if you’d like! I’ve personally never eaten them raw, but from what I’ve read, it is very healthy! Let me know how it is!